Thursday, November 28, 2013

Top 5 new features in Windows 8.1


Windows 8.1 is RTM


Windows 8.1 is out now for a couple of weeks.

So what has been changed in Windows 8.1 in regards to its predecessor Windows 8? Below you will find a top 5 listed!

On 1: The Start button has returned!

1. Start ButtonOn of the big boos of the users that migrated to Windows 8 was the missing Star button. Now in Windows 8.1 it has returned. However, notice that it's only the button. The old-skool menu hasn't returned, it still opens the Metro UI Start menu.


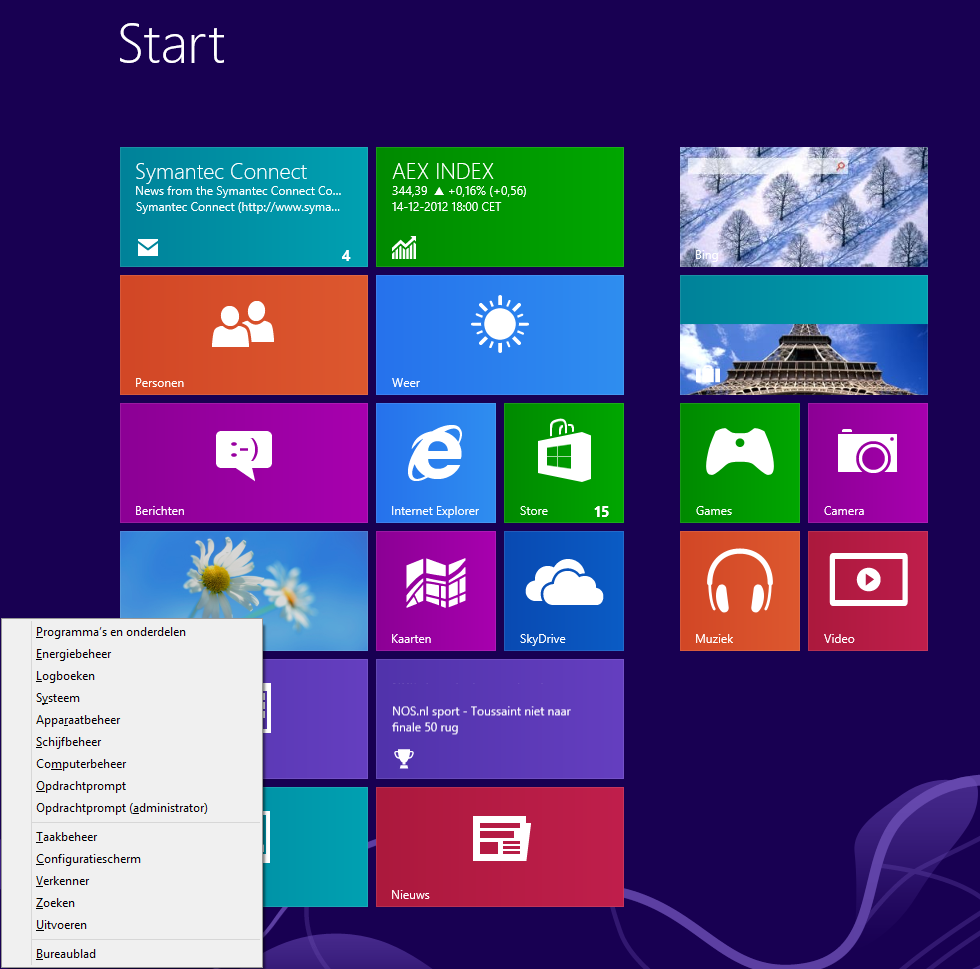
Also when you rightclick the start button, it opens a new small start menu, which is similar to the Windows + X shortcut you could use in Windows 8.

On 2: Boot to desktop


2. Boot to Desktop Another option is to boot directly to the desktop after the computer has started, instead of showing the Metro UI Start menu. This was also a wish of the old skool users, which were used to the Desktop.


On 3: ImprovedSearch

 
The search possibilities have been improved greatly in Windows 8.1. When you search for certain things, the relevant links will be shown directly. Also the apps that can be used to open it will be showed directly. For instance, Media Player to open music or Internet Explorer to open the links.
 

On 4: More possibilities for showing windows

There are now more possibilities in showing content on your screen. It can be split in half, or with a sidebar (1/4 and 3/4 of your screen). If you own a multi-monitor display setup, it is now possible to show 8 apps at a time. 4. More Windowing Options for New-Style Apps
 

 On 5: More robust settings

There are more settings available in the PC settings menu then previously. Think about settings to change for your Display, mouse, keyboard, autoplay, account etcetera. Also, you can find CPU / Memory information, and much much more! 6. More Robust Settings in Modern Interface

Thursday, April 11, 2013

Websecurify | Blog: Introducing Panic Mode

Websecurify | Blog: Introducing Panic Mode: Simply put, Panic Mode is an extension for Chrome and soon for Firefox, which allows you stay secure online. When you turn it on, all ht...

Useful tool to browse with SSL in Chrome and Firefox. Can be really usefull when using public Wifi Hotspots, like for instance on an airport or at McDonalds or an Internet café. Handige

Thursday, April 4, 2013

Hyper-V>> Save diskspace using a differencing disk

In the last blog, there is explained how to create a virtual machine. In this blog we'll talk about creating a differencing disk. 

What is a differencing disk?

A differencing disk is a disk that's based on a so called parent disk. This parent disk can be a sysprepped image of Windows 7/8/2008/2012 or another OS. It can also be just a plain simple image of another machine. The differencing disk uses this parent disk, and saves only the differences in it's own disk. This way you can create lots of machines that are based on the same parent disk. The performance will be a little less good then normally, but it's still workable. However, because you'll need less snapshots and initial disks, the free disk space on your storage will be better. The snapshots you will make will also be smaller. 

How do I create a differencing disk?


1. First, make a new VM. See my previous blog for the steps that need to be taken to achieve this.

2. Give the VM a fitting name.
 
 
3. Choose 'Attach a virtual hard disk later' and finish the wizard.


4. You will return to the Hyper-V Manager. Right click, and choose Settings. THe screen below will appear. Go to IDE Controller 0 in the left pane, and click on Add.
 
 
 5. You will see the following screen. Now click on New.


 6. Click Next. The following screen will appear. Choose VHDX. Take notice that this format is only compatible with Windows 8 and newer.
 7. Click Next again, and now you can choose the type of disk. Choose for differencing disk.


8. Give the disk a recognizable name, and click on Next. 
 
 
9. Choose the parent disk in the next screen. In this particular case, I've chosen a sysprepped Windows 7 disk.


10. Click again on next, and check the summary to see if everything is OK. When this is the case, click Finish. 
 

Note: You can check if the disk really is a differencing disk using Powershell. You can also check this in the properties of the disk. 

Wednesday, April 3, 2013

Hyper-V - How to create a virtual machine

This blog describes the steps on how to create a virtual machine in Hyper-V. See this blog for more information on enabling Hyper-V in Windows 8. 

The required steps are the following:

1. Open the Hyper-V Manager using the start menu (type 'Hyper-V').

2. The Hyper-V Manager is opened. Go to Actions, to create a new virtual machine:
3. A wizard will appear. Click Next on the first screen. On the second screen you can give your virtual machine a name:
 
 
4. After giving the VM a name, click next to get the next screen. Here you can assign the amount of startup memory for your machine. We have chosen for 2 GB in the example.

 
5. Click Next again and Next to set an optional networkconnection (these settings can be altered later on if neccessary).
 
 
6. Click Next again to setup the settings for your virtual hard drive.
 
 
7. Again click next to setup the installation options. You can choose to boot from the network, load an iso or other bootable media, or to skip this step for now.  
 
 
8. Click next again for a summary of your settings, and click finish to end the wizard. 

 
9. You will return to the Hyper-V Manager. Here you will find an overview of all your virtual machines. Right-click your created machine, and click on Connect...
10. Now you will see the screen below. Here you can start, inspect, shut down and snapshot your virtual machine.


11. Press the on/off switch to start the computer. With the 'media' menu you can insert an iso to install Windows or Linux(as an example)


Free Hyper-V in Windows 8! How do I enable this?

Like some of you might already know, Hyper-V is a free feature in Windows 8 nowadays! This will save you an expensive VMWare license. The only thing what you need is to activate the feature (and also you'll need a computer with VT technology). Here's how:

1. Go to the Control panel, and browse to Programs and Features. 
   
2. Choose "Turn Windows features on or off"


3. Check the box in front of Hyper-V, and klik OK. Navigate through all the questions, and reboot your computer at the end when asked.


4. Once booted back up, you can find the Hyper-V applications in your Start Menu, when looking for "Hyper". Here is what you will see:
 
With the Hyper-V Manager you can create and manage new VM's!

Thursday, March 28, 2013

Typical IT department

Ed's Fixit Service!
For a glimpse of a typical IT department :)

Windows 8 shortcuts

Windows 8 is on the market for some time now, but despite that fact, some users still find it hard to get used to the interface. For some, the absense of the Start menu is a reason not to upgrade. But no worries! Hopefully after reading this blog, a world of user friendliness will be opened.

To navigate quickly within Windows 8, it's useful to make use of shortcuts. Below you can find some shortcuts documented: 

When you press the Windows button, you can switch between the program that is currently running, and the application list:


Windows 8 Start screen
When you scroll your mouse in the start screen, you will navigate left or right. Once you start typing the name of an application, for instance "Oult", then Windows will search for programs with that phrase in their name. This way you can open programs really fast and easy.

Press Windows + C for the so called 'Charms bar'. This menu is what opens on the right side of your screen, it also opens when you move your mouse to the right bottom corner of your screen.

Press Windows + I to go quickly to the 'Settings' screen. Here you will find 'PC Settings', 'Personalization', and 'Control Panel'.

If you quickly want to see all your Apps, then press Windows + Q.

To search quickly for files, press Windows + F.

When you have connected an extra monitor, to extend or dulicate your monitor, or use a beamer, then this combination will show you your options: Windows + P.

If you want to lock your screen for security reasons? Then press Windows + L.

Quickly open Windows Explorer? --> Windows + E.

Quickly open the "Run" box?  --> Windows + R.
 

And possibly the most useful command (which comes closest to the traditional Start menu): The Windows Tools menu --> Windows + X.

Antivirus Freeware

A couple of good anti-virus / anti-malware programs listed,  anno march 2013!

Avast Antivirus Free - Dutch
Simple and free anti-virus and anti-spyware package. Has the ability for remote assistance, and also to upgrade to premium versions.

AVG Free Antivirus
This anti-virus solution provides offcourse anti-virus prevention, but also anti-malware and anti-spyware prevention. It also promises to enhance the performance of your system. Above all of this, the AVG helpdesk number is free to call!telefonisch te bereiken is.

Avira Antivirus (Free)
This AV solution offers anti-virus, but also realtime protection, Anti Ad/Spyware, Browser Tracker blocker, and also a Website Safety advisor. A very complete package, and it's free! 

Microsoft Windows Security Essentials
This software is from Microsoft, and is also free! It's a virusscanner and antispyware scanner, and works from Windows XP 'till Windows 7. It's integrated in Windows 8.x and RT in to the Windows Defender Module. 

HijackThis!
HijackThis! is the ultimate tool to cleanup your computer of annoying spyware. But be careful! It's a highly advanced program, and is best used by an experienced IT person with good knowledge of the Windows registry. When the wrong keys are removed, your computer could work even worse then before. If you don't trust it completely, consult the many Hijackthis forums on the internet, to check your logfile!

Microsoft Stand-alone System Sweeper
This program doesn't require to be installed, and scans your computer for faults.

McAfee Stinger
This one is also a free tool, this time it's McAfee. It scans on a list of known viruses. It isn't a replacement for an anti-virus solution, but can assist during a recent outbreak of a virus.

Panda Cloud Antivirus
Panda Cloud Antivirus is a free tool that takes advantage of the latest developments, the Cloud. It has great possibilities, like: Realtime AV/AS, Process monitor, automatic silent updates, URL/Webfiltering, translation to up to twenty languages, and more! 

Kaspersky Security Scan
This free tool from Kaspersky scans your pc for virusses and other garbage, and cleans it up. Also it provides a complete advise about your computers health status at the end of the scan. 

ZoneAlarm Antivirus + Firewall 2013
This is also a great free antivirus from ZoneAlarm. It obviously contains anti-virus, but also a 2 way firewall, a privacy and security toolbar, advanced download protection and identity protection.


Wednesday, March 27, 2013

Some handy freeware links!


Below you can find some useful FREEWARE links!

But first, what exactly is 'freeware'? Freeware is a commonly used term for software of which the author has given a license for use and distribution in an unmodified form, without asking for any kind of fee. With other words, free to use software! Enough of the theory! Here are some links :)

AUTORUNS

Autoruns is a small tool created by Microsoft what you can use to see and manage the programs that start with your computer. It can come in real handy when your computer is slow at starting up.

PSTOOLS

PSTOOLS is a toolsuite from Microsoft, comparable to Autoruns. Both are very convenient tools to manage your computerenvironment as a user or even as a system administrator. Follow the link for further instructions!

Microsoft Virtual Academy

Microsoft Virtual Academy


Do you want to tune your knowledge of Microsoft products? Take a look at the  Microsoft Virtual Academy. Create a free account, and choose which program you want to participate in!

This site is a great way to help study for a Microsoft exam, or just to keep up to date of your overall knowledge of Microsoft products!

The latest products are covered, and when done, you have the ability to obtain a certificate that you have followed the course. Also you can save up points, to become the best scoring learner of the week or month!